Circuit 1.4: Programmed Button
Let’s add the button back to the mix.
This time we will read the button state via the Arduino and then use it to make the LED light up.
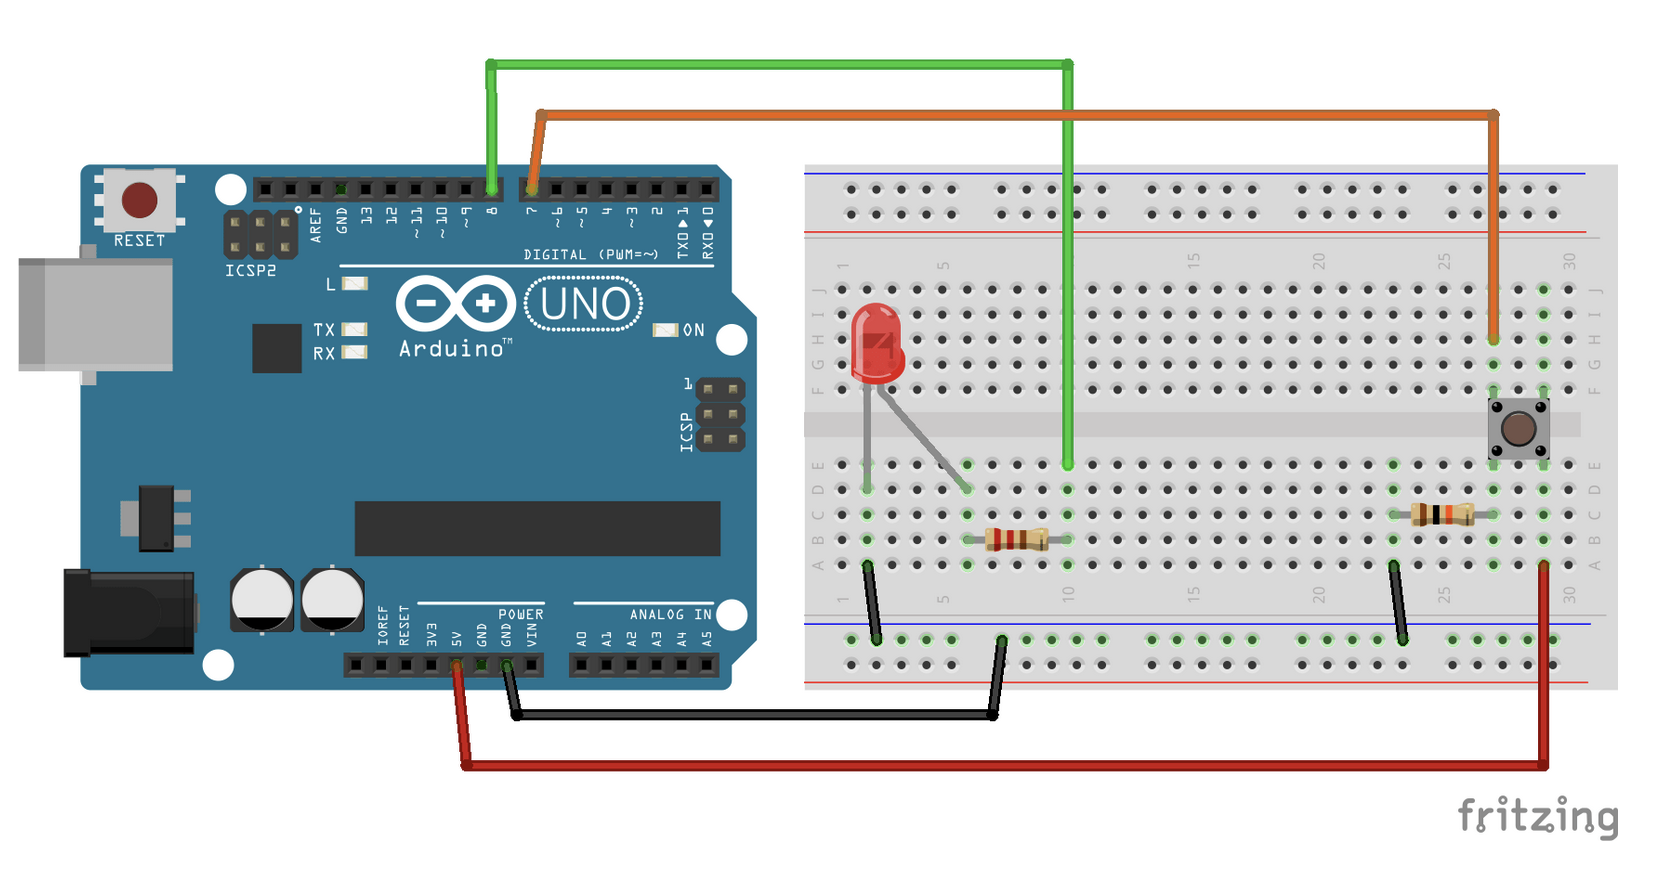
Change the circuit to this:
This is the code:
int led_pin = 3;
int button_pin = 4;
bool button_state = false;

void setup() {
  pinMode(led_pin, OUTPUT);
  pinMode(button_pin, INPUT);
}

void loop() {
  button_state = digitalRead(button_pin);
  digitalWrite(led_pin, button_state);
}
Pulldown resistor
Why does the button need a resistor? Good question!
-
When the button is in an open state it there is no defined value on its pin but the Arduino will still try to read it
-
In this case the open button behaves like an antenna and catches electrical charge around it (Sometimes that’s what you want, see EMF/Ghost detector)
-
Try removing the resistor and look at the difference!
-
The Arduino comes with an internal resistor for this exact case, search for
pinMode(pin, INPUT_PULLUP)